
If your image is wider or taller than these dimensions then it won’t fit on the screen when projected. The larger dimension is the width (1600 pixels) and the smaller side is the height (1200 pixels). This means that if your image is in portrait mode it should be 1200 pixels tall and the width will need to adjust accordingly. Your processing software should sort this for you if you set the maximum dimensions to width = 1600 pixels and height = 1200 pixels.
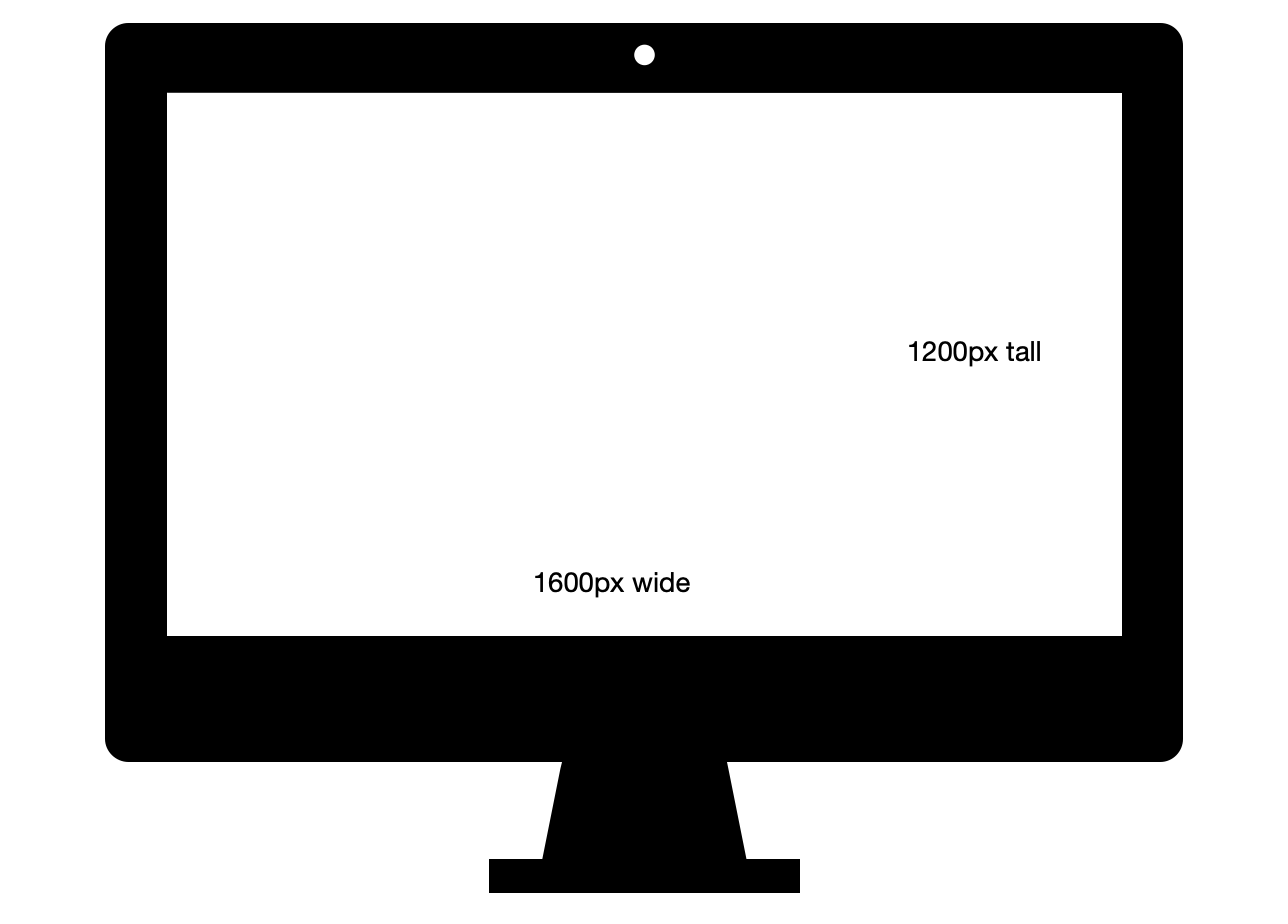
Your camera will capture an image at a certain ratio. This could be 3:2 , 4:3, 5:4 or even 1:1. As far as re-sizing your image the software should maintain this ratio but adjust the size of your image so that the longest side, width or height, fits within the constraints you specify.
If your image is for projection do not worry about dpi (dots per inch). That is relevant for printing not projection. The colour space is sRGB (standard Red Green Blue) as this is compatible with most systems. Here are a few examples of different processing software and re-sizing the images.
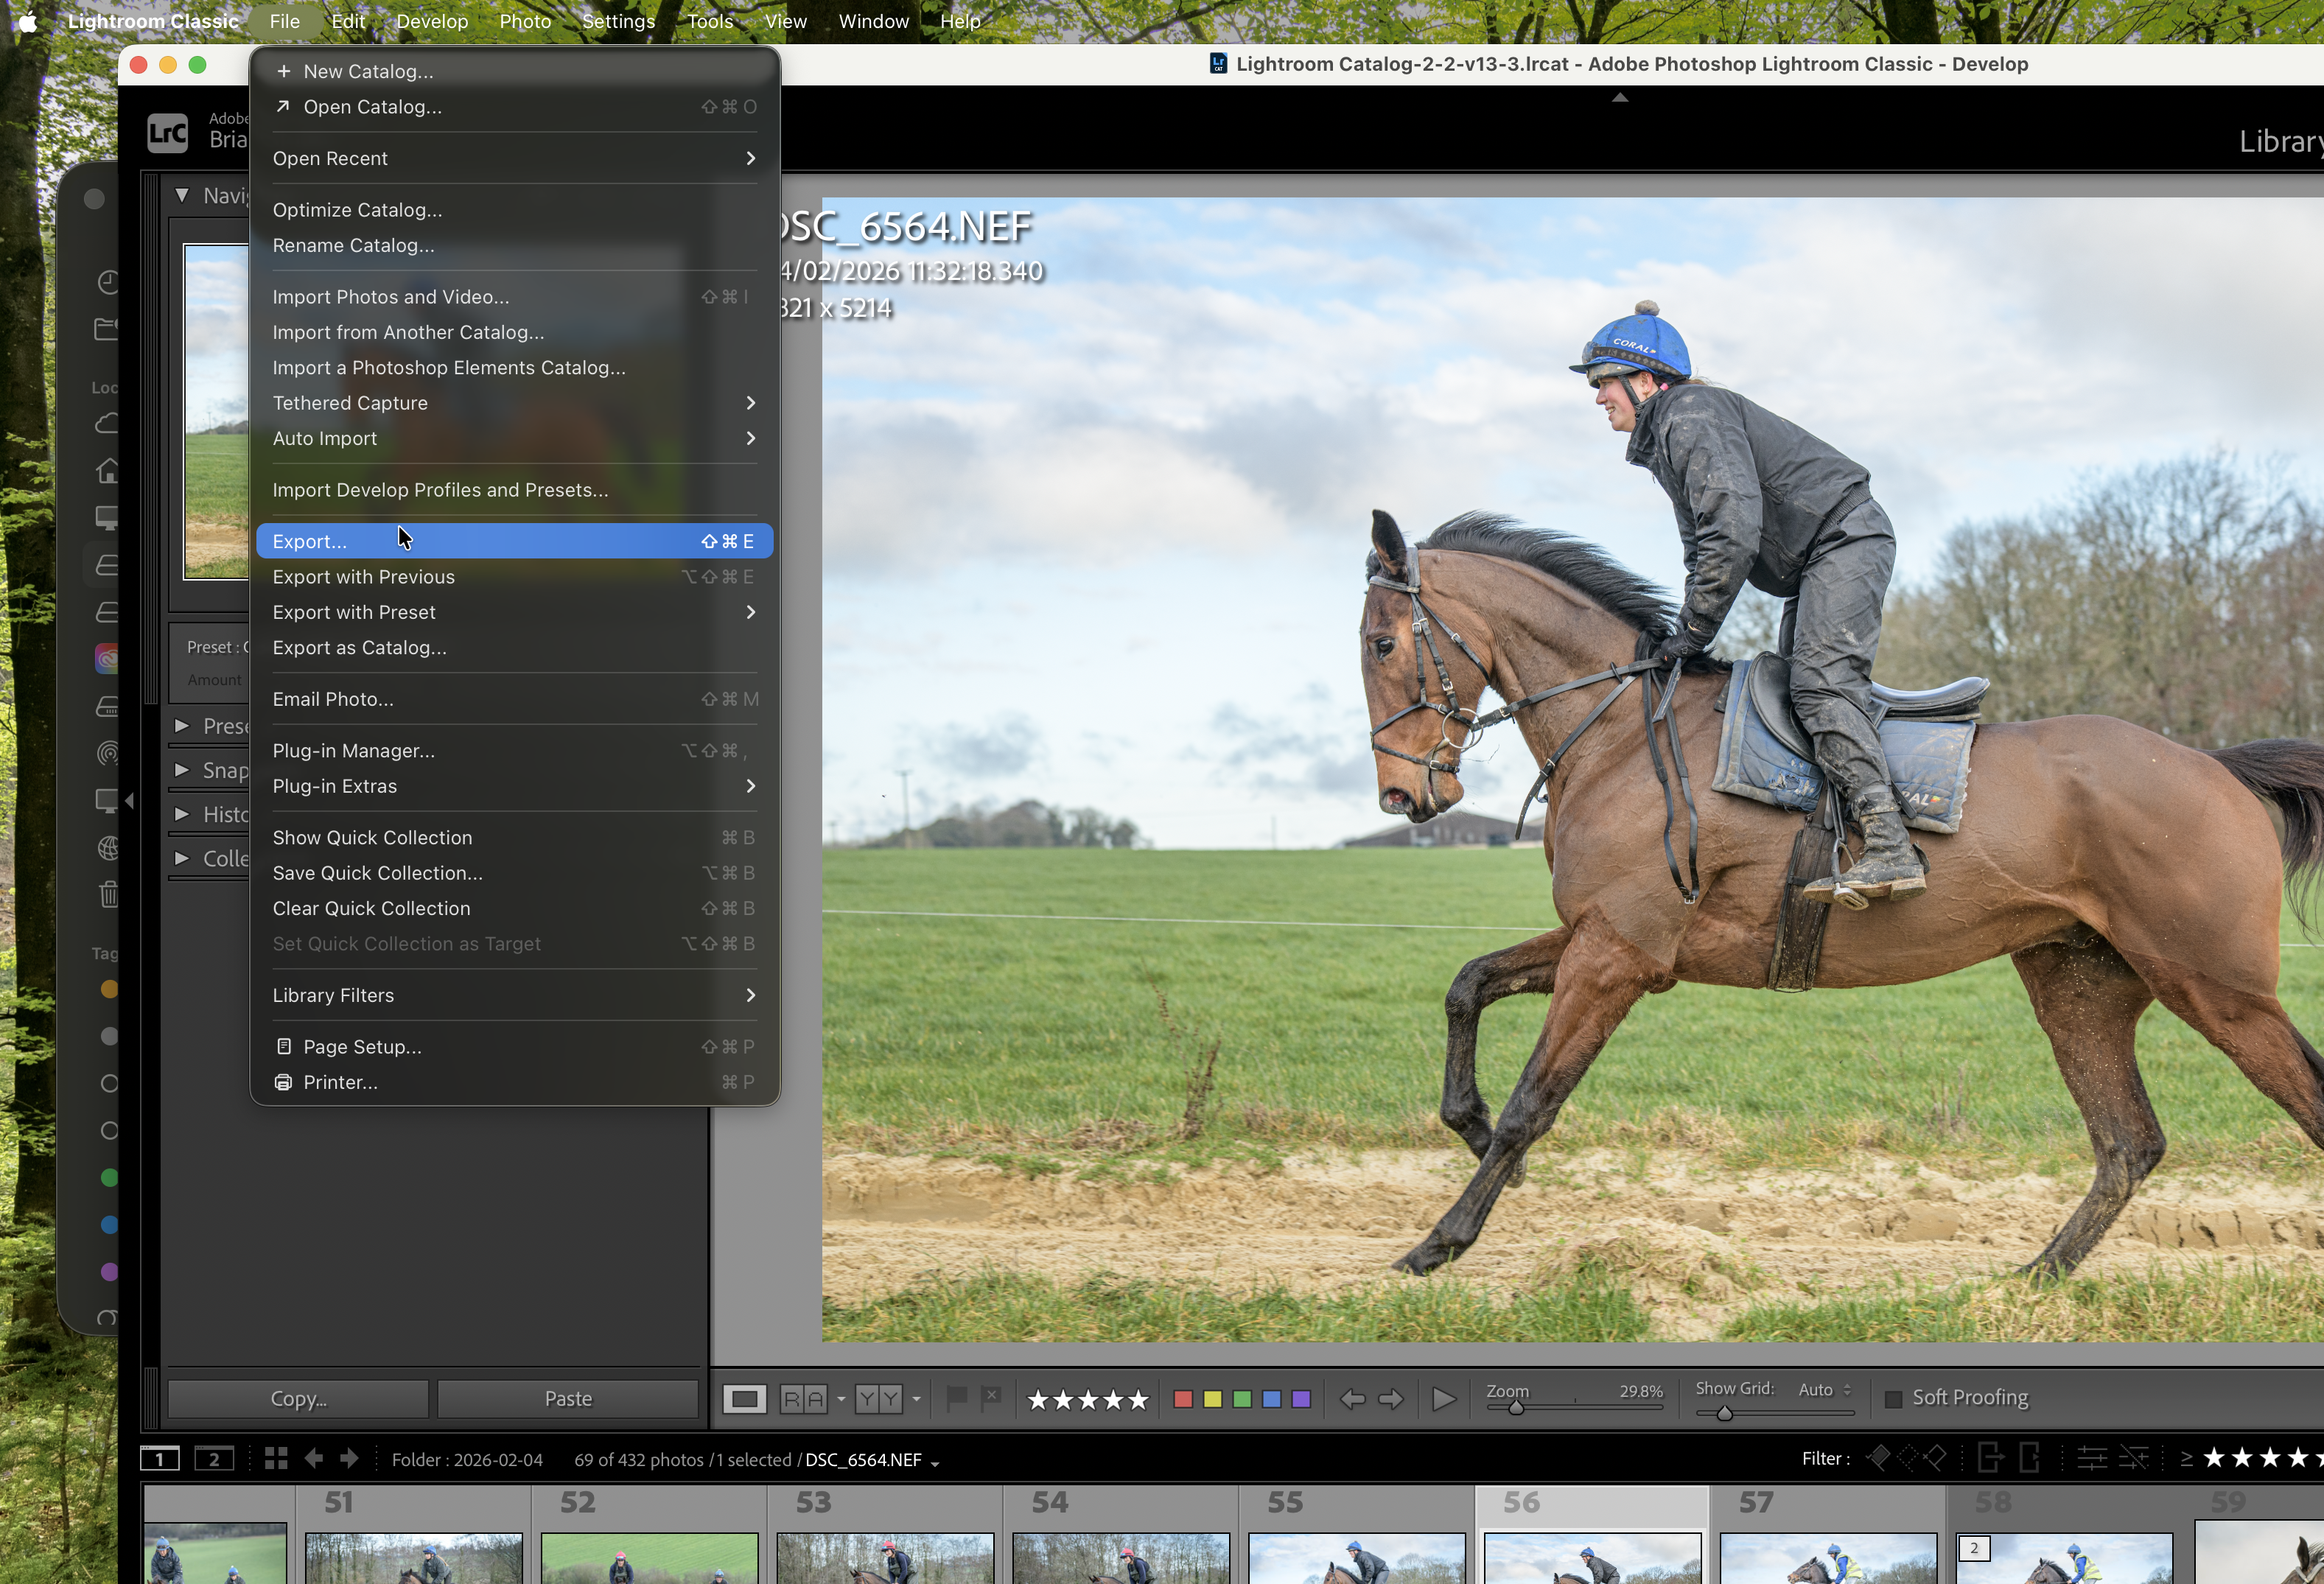
From the top menu select “File” then “Export”
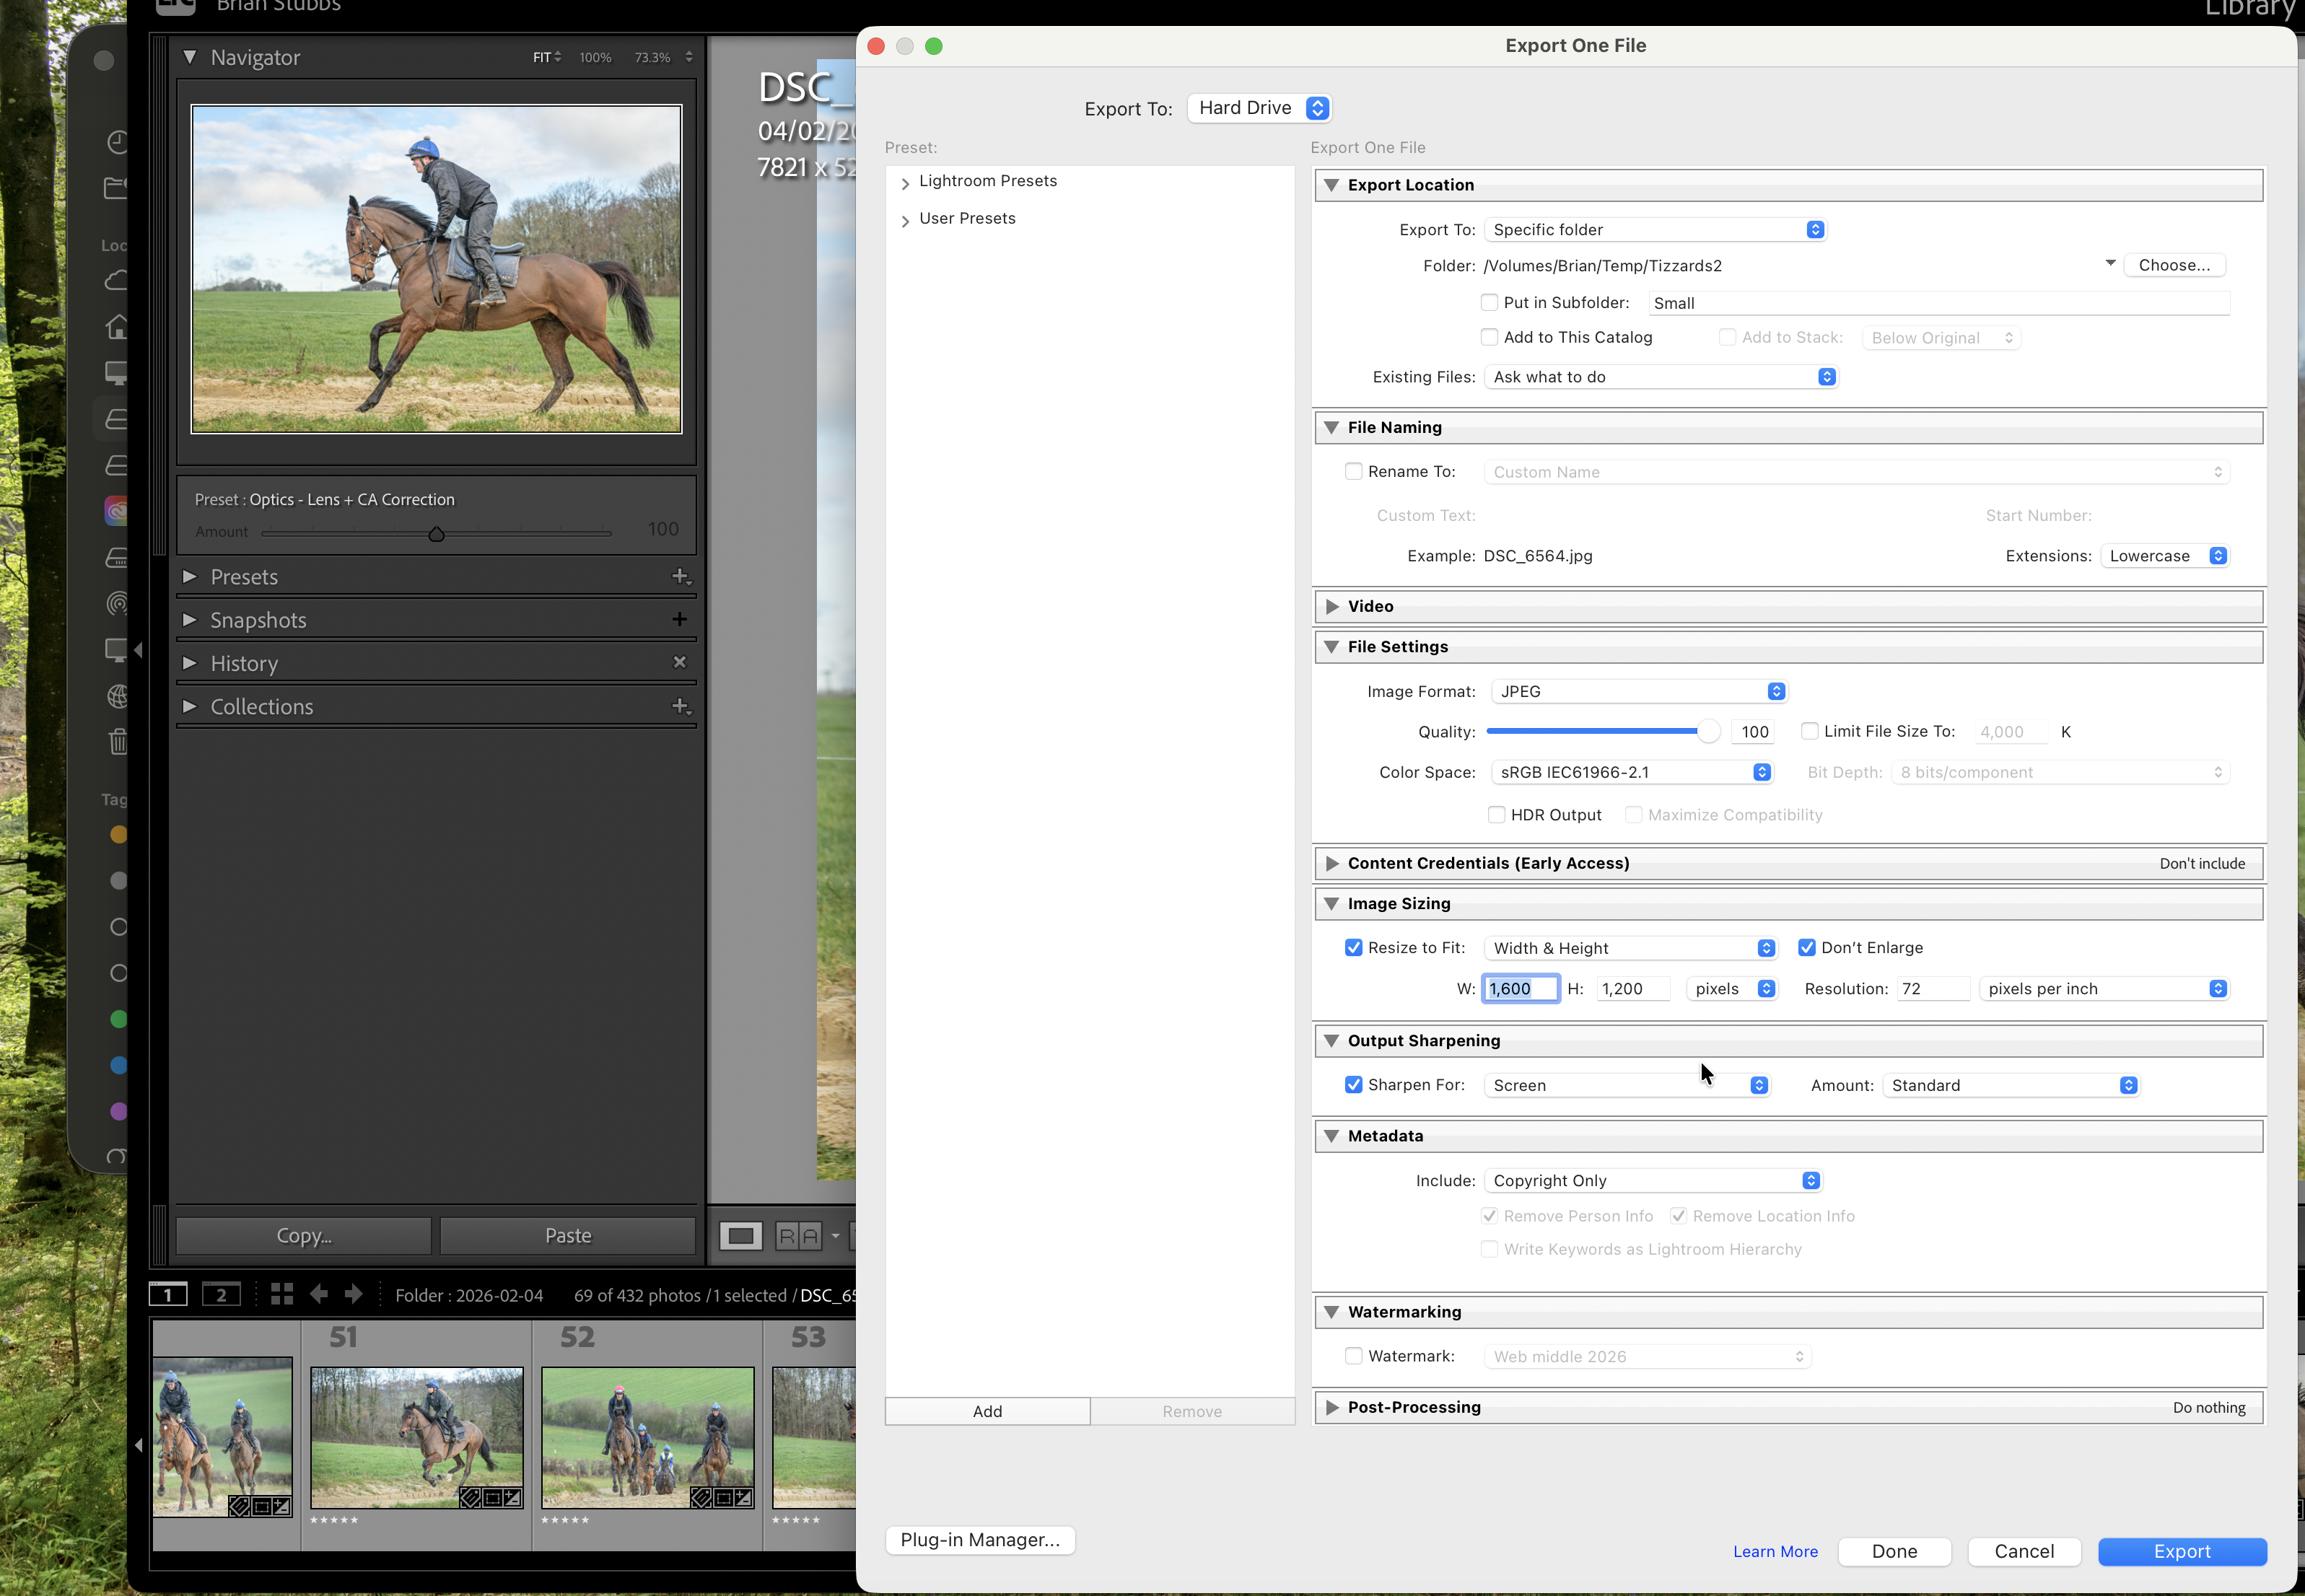
Export location is where you are going to save your file. Clicking on “Choose” allows you to specify where you want the file saved.
File naming allows you to alter the name for the saved file or you can accept the default name.
File settings - here you must specify JPEG as the image format, maximum quality. You shouldn’t need to limit file size but you can set a maximum if required. The colour space should be sRGB.
Image sizing - this is the key area for us. Tick the box "Resize to fit" width and height and "don’t enlarge".
Output sharpening - the default is "sharpen for screen" and the amount "standard". These will be fine.
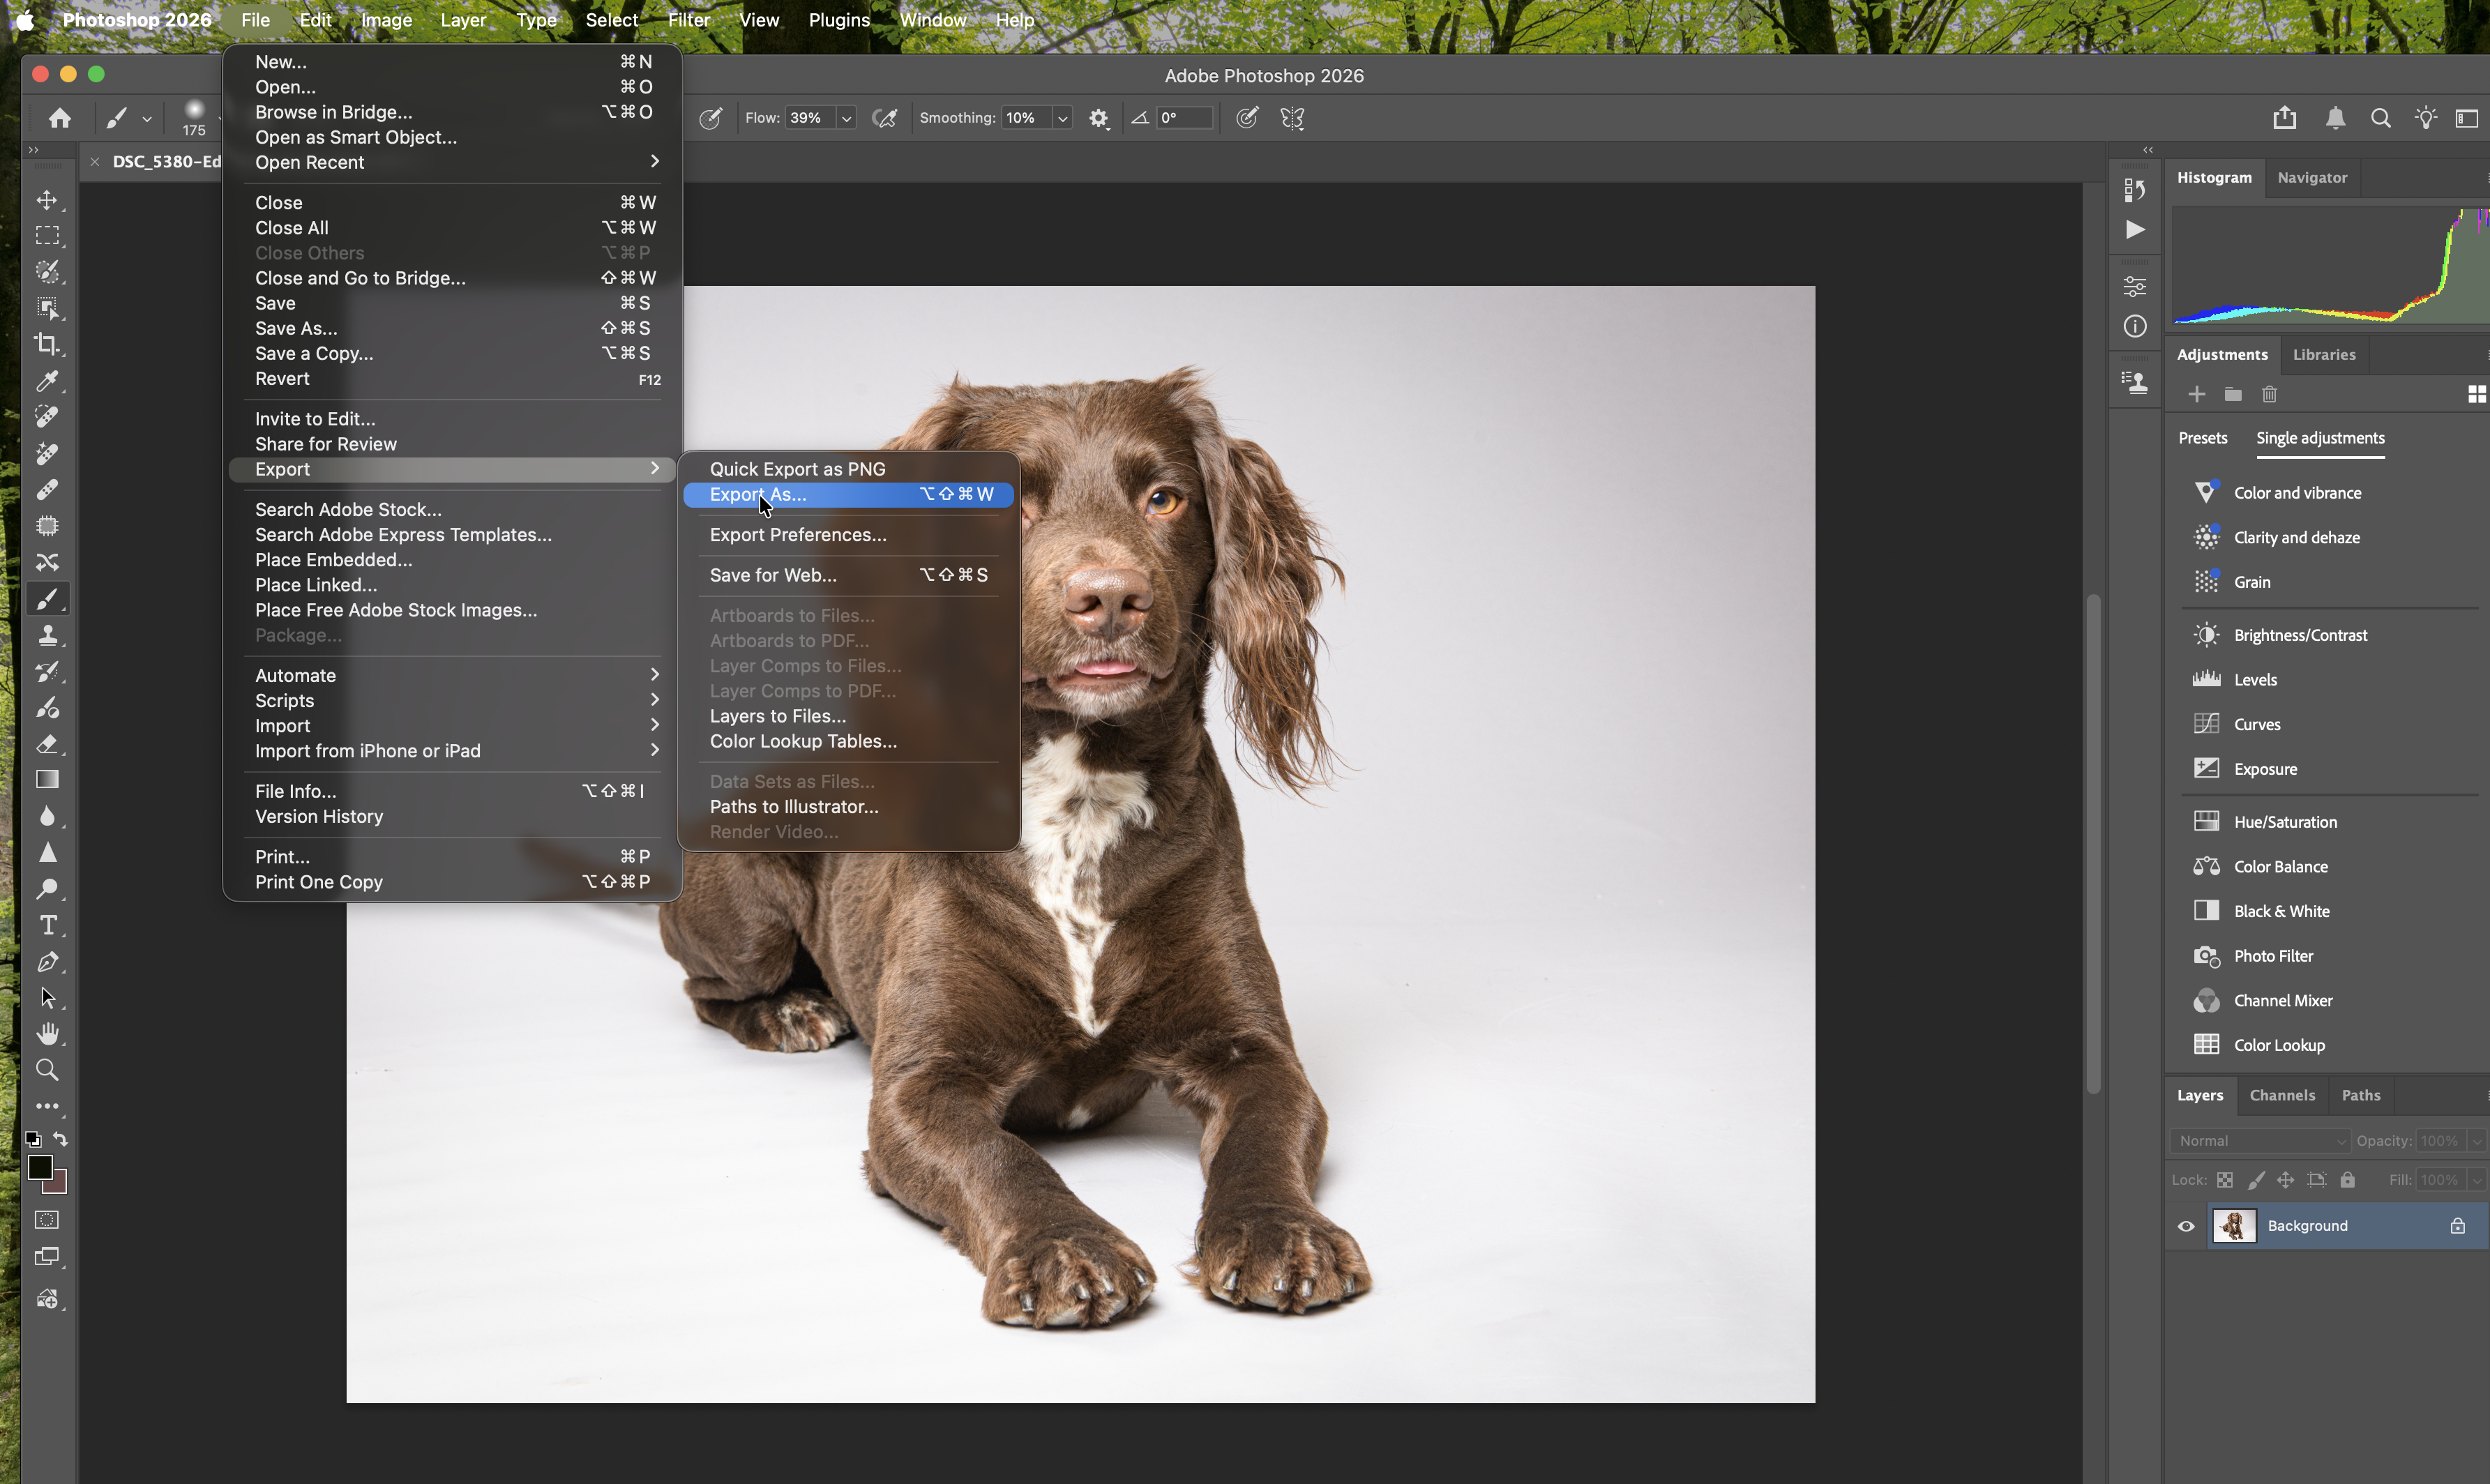
In Photoshop from the top menu select "File", "Export", "Export As".
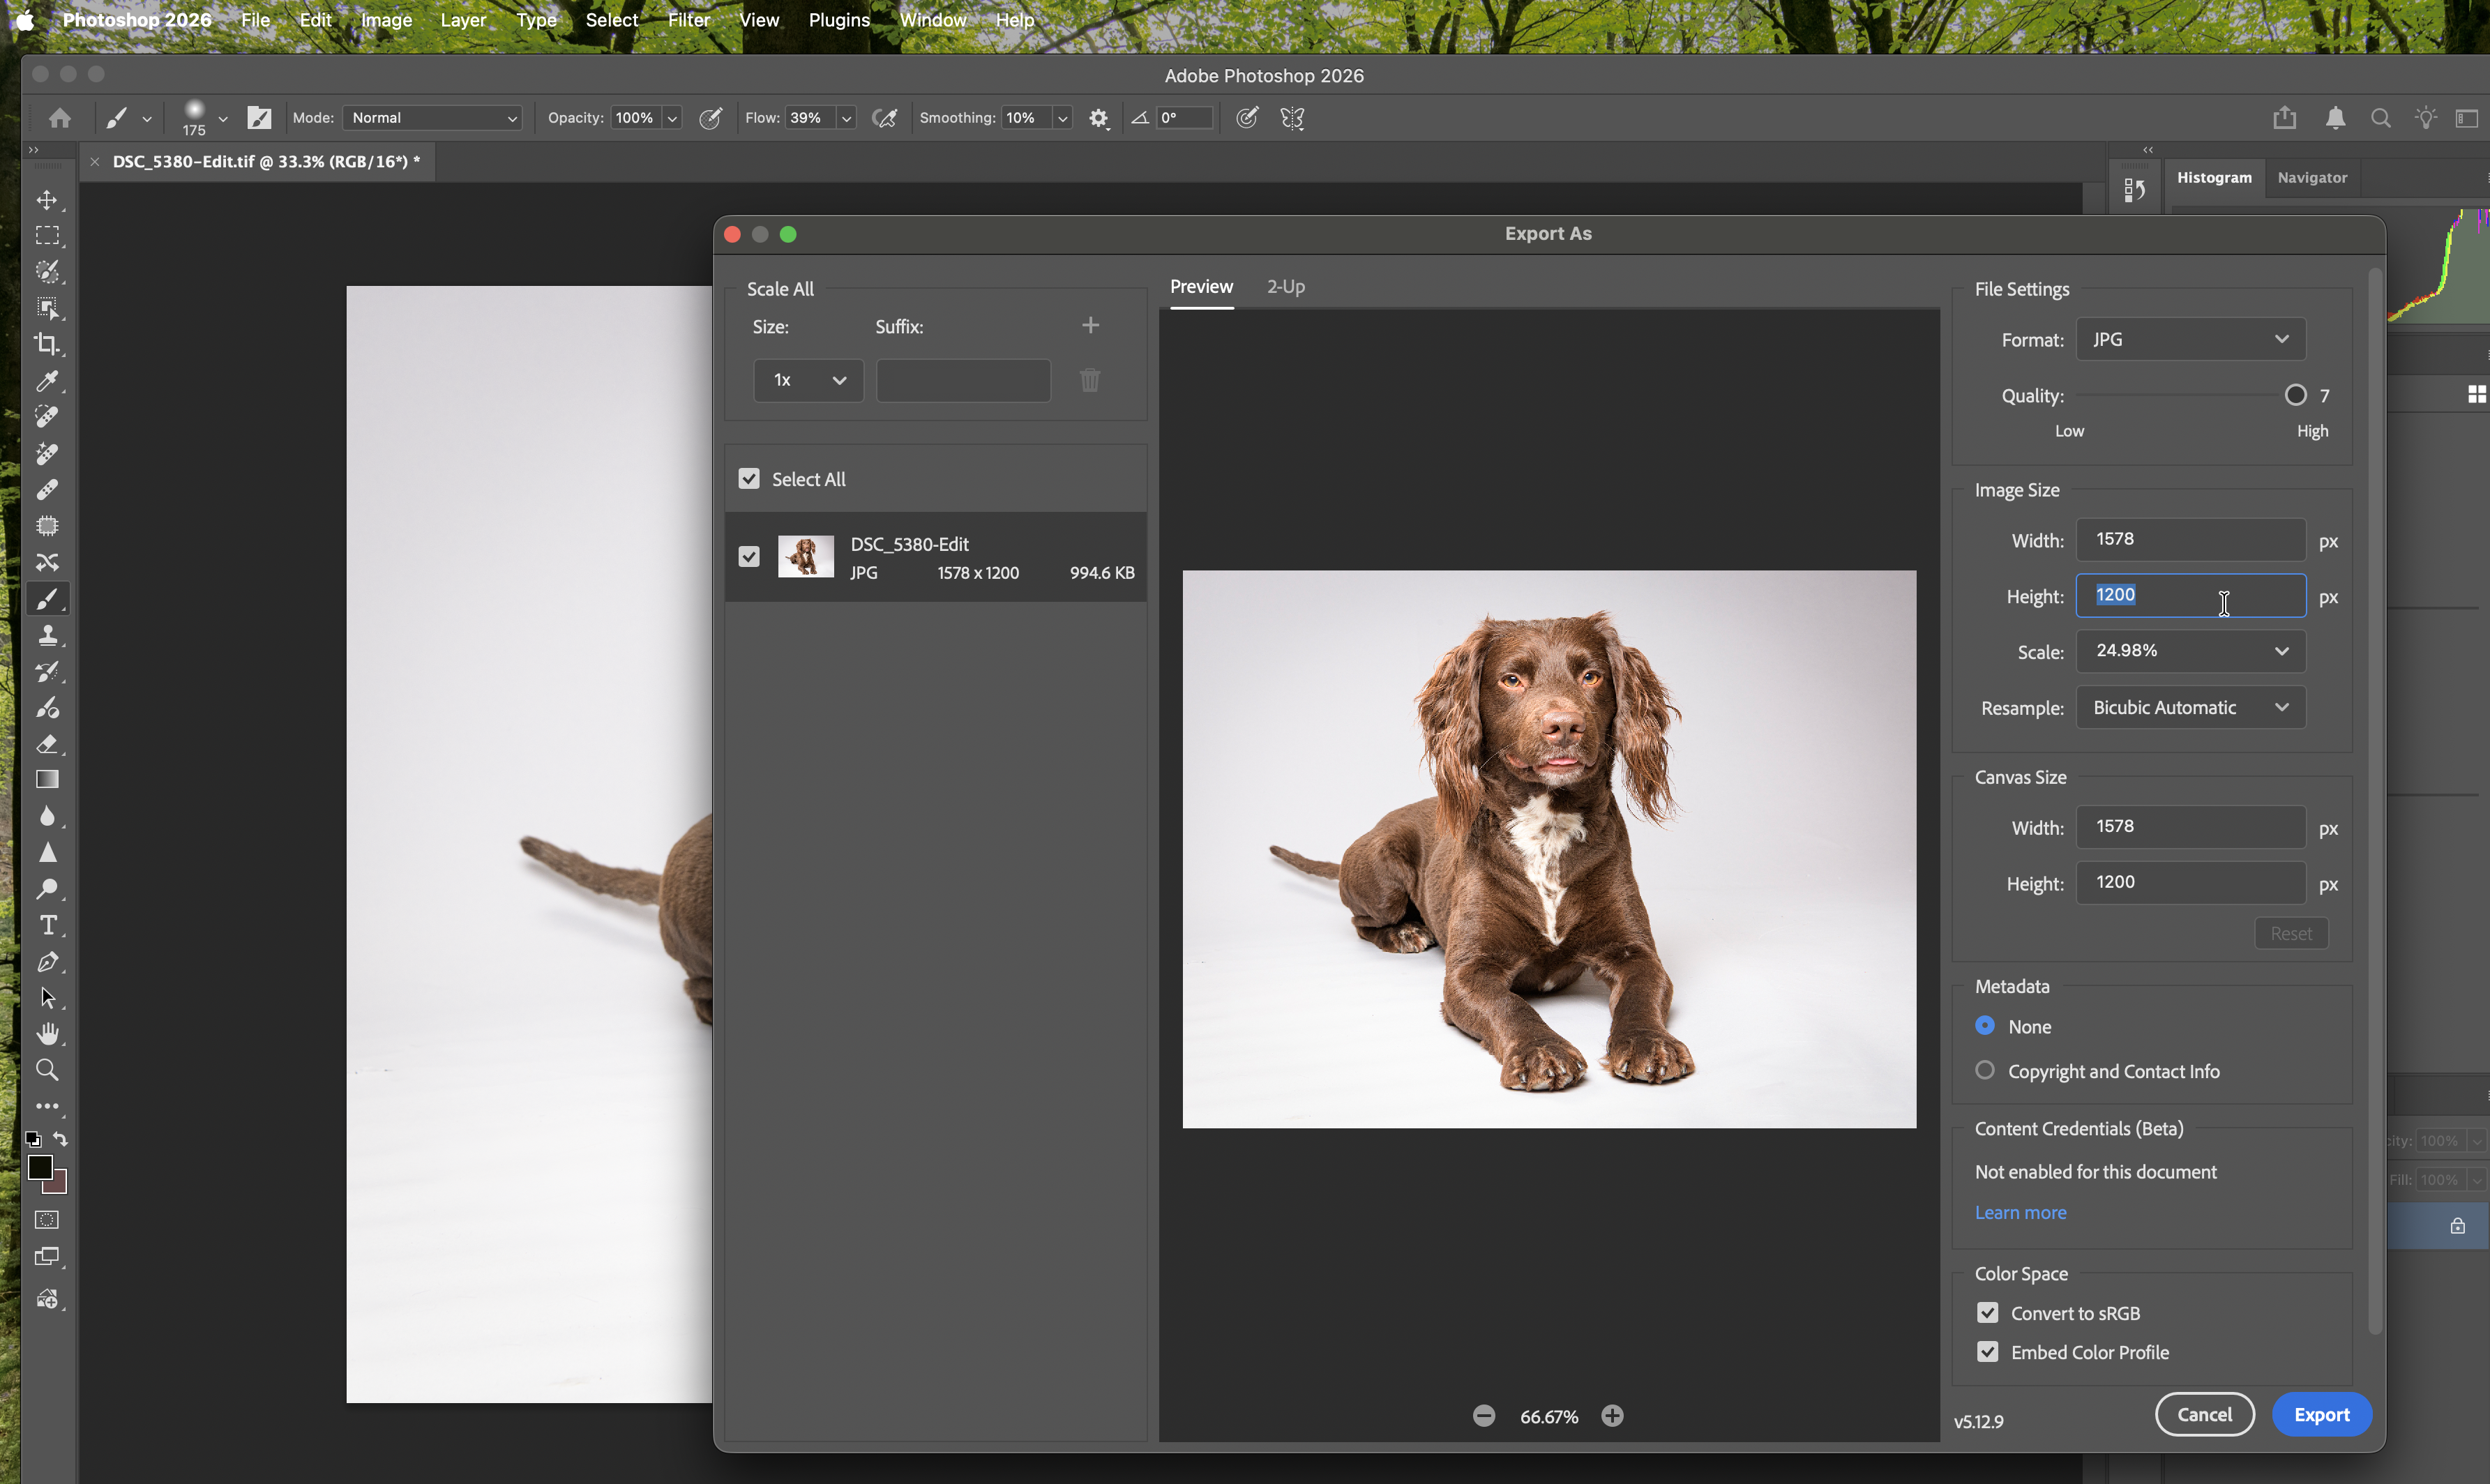
We will need to specify "Jpg" (Jpeg) for the format. Set the quality to 7 / High.
Then specify the Image Size width and height. In the example above you will see that the software has accepted the height at 1200 but has defaulted to 1578 pixels wide because the specific image ratio isn’t wide enough for 1600. The scale will show the amount of scaling performed to match the width and height settings you have chosen.
Then click on "Export" to save your file.
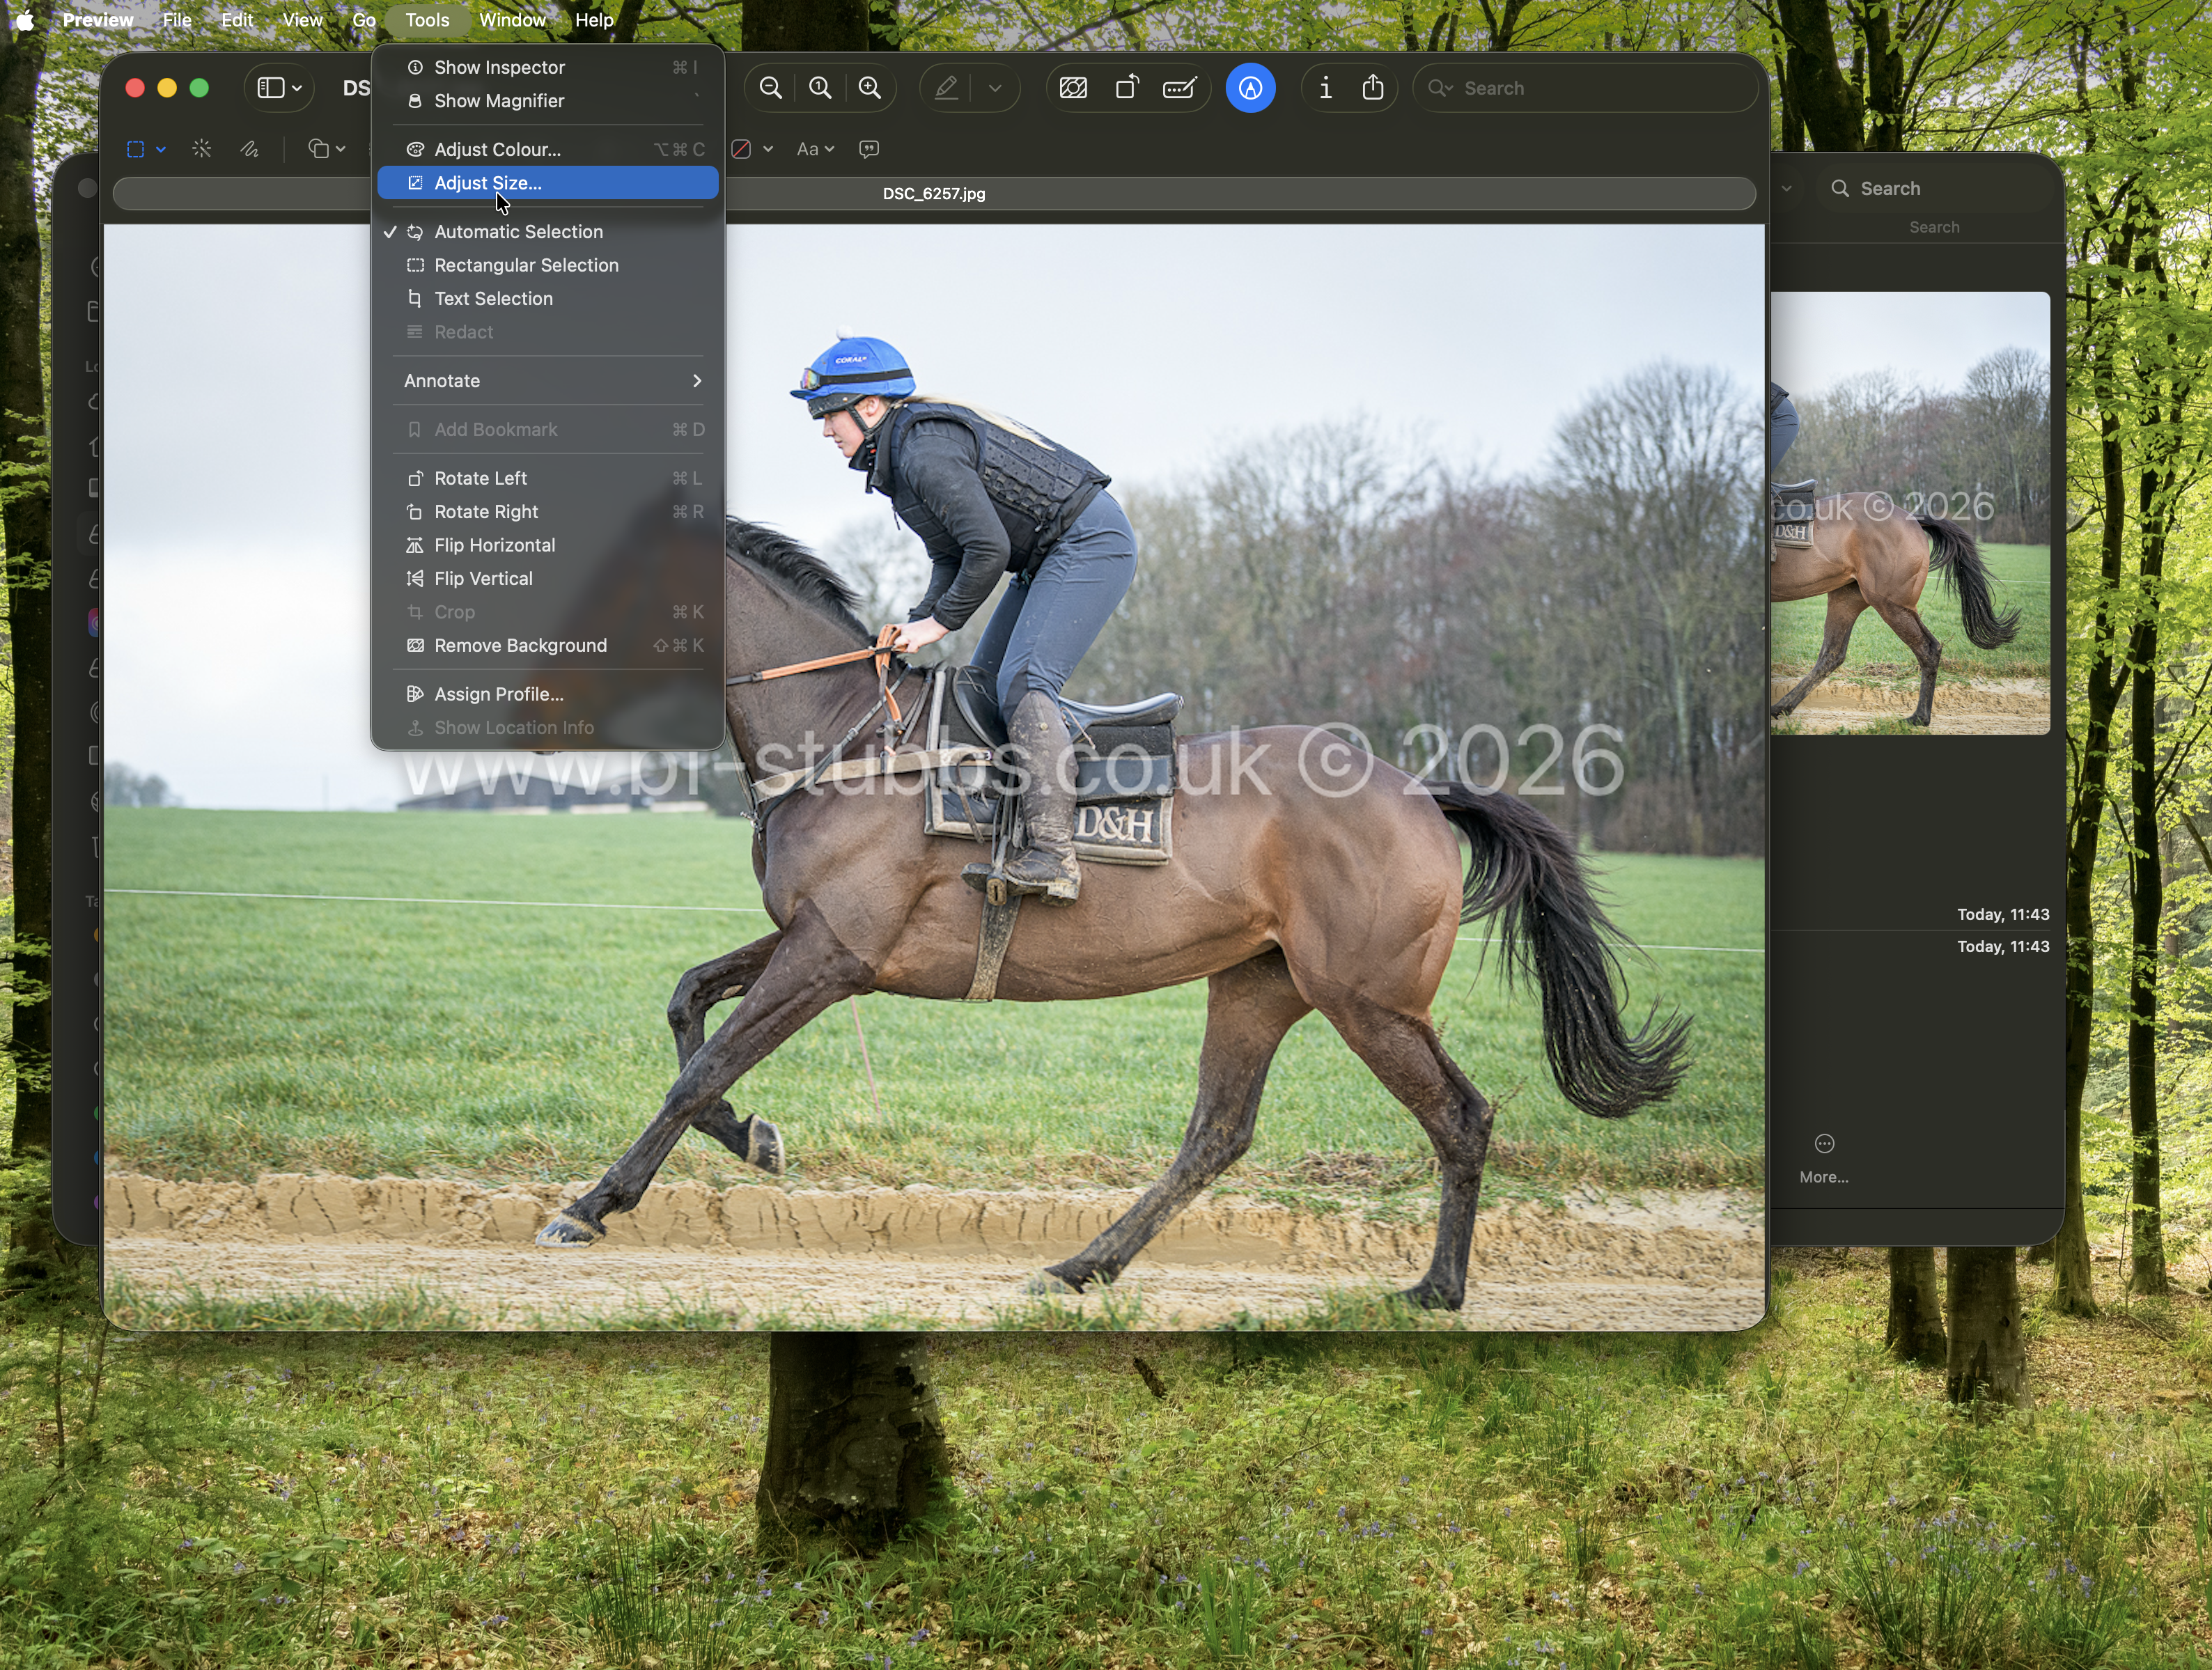
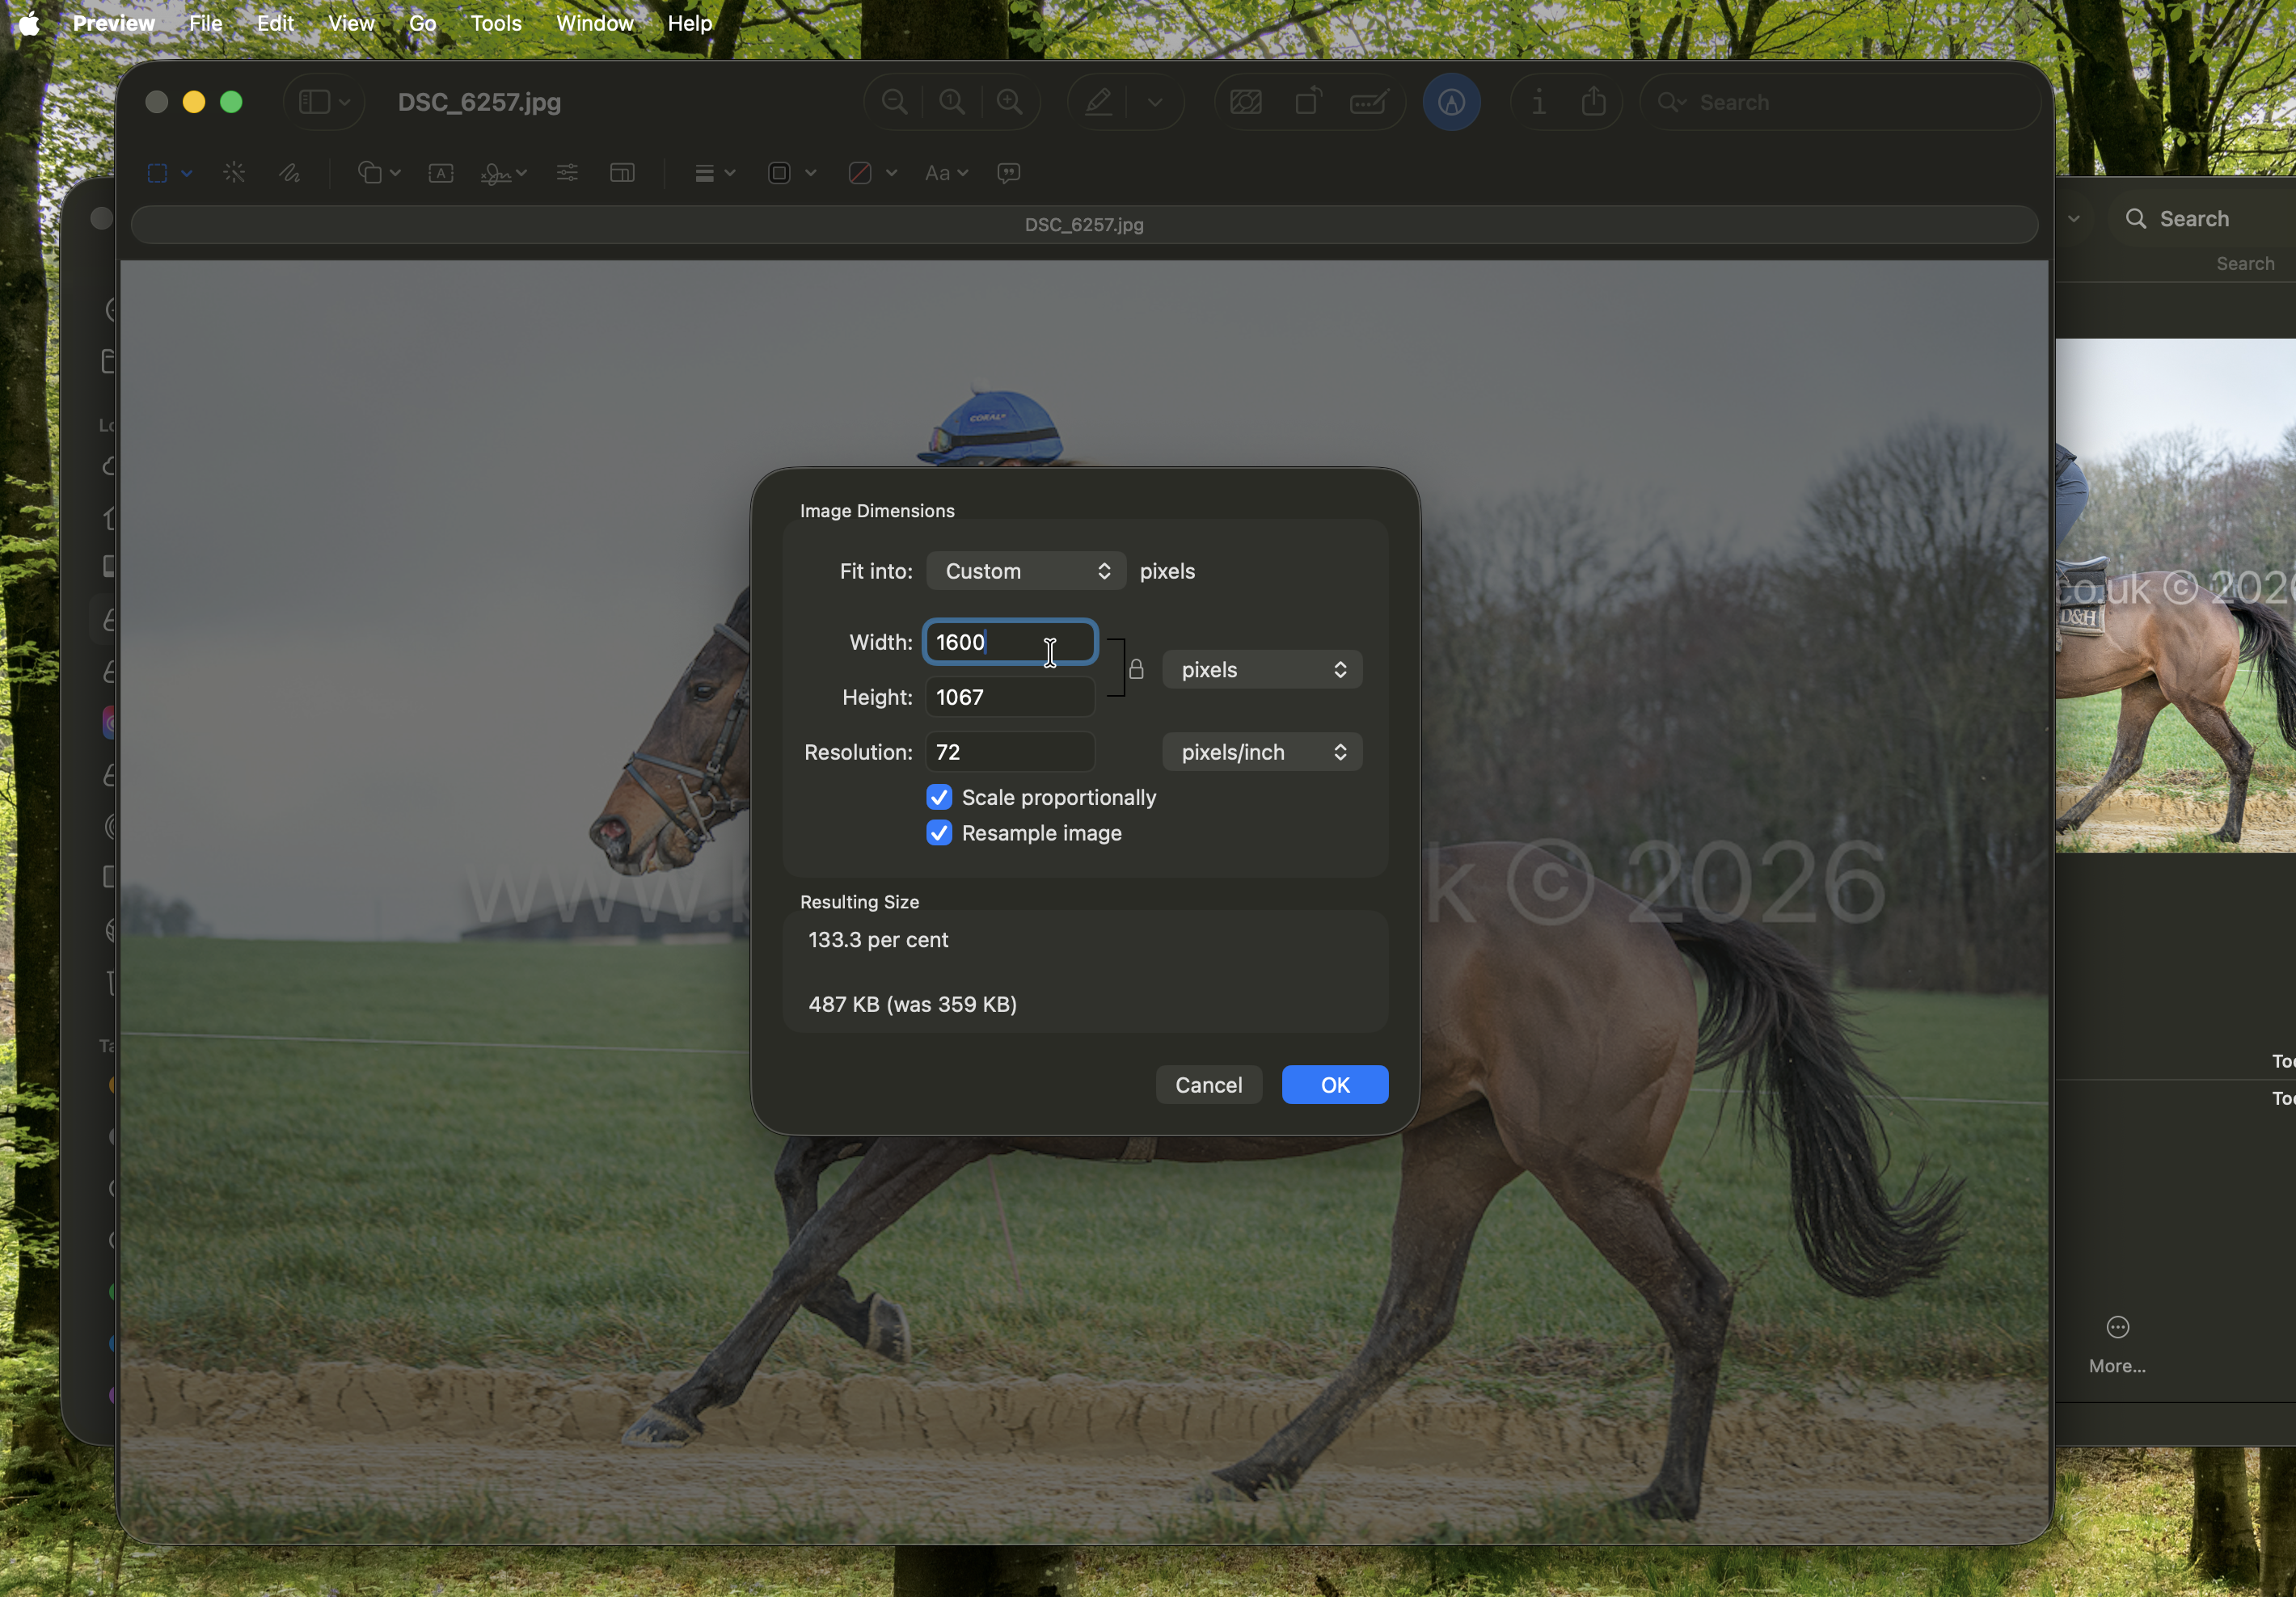
The software will then sort the proportions. 1600 x 1200 is a 4:3 ratio. The image shown above has a ratio of 3:2 so the software adjusts the size of the height to keep the ratio and scale proportionally.
It is important that the "Scale proportionally" box is ticked otherwise your image will distort.
Then click "OK" and you can go on to save the image now re-sized as specified.
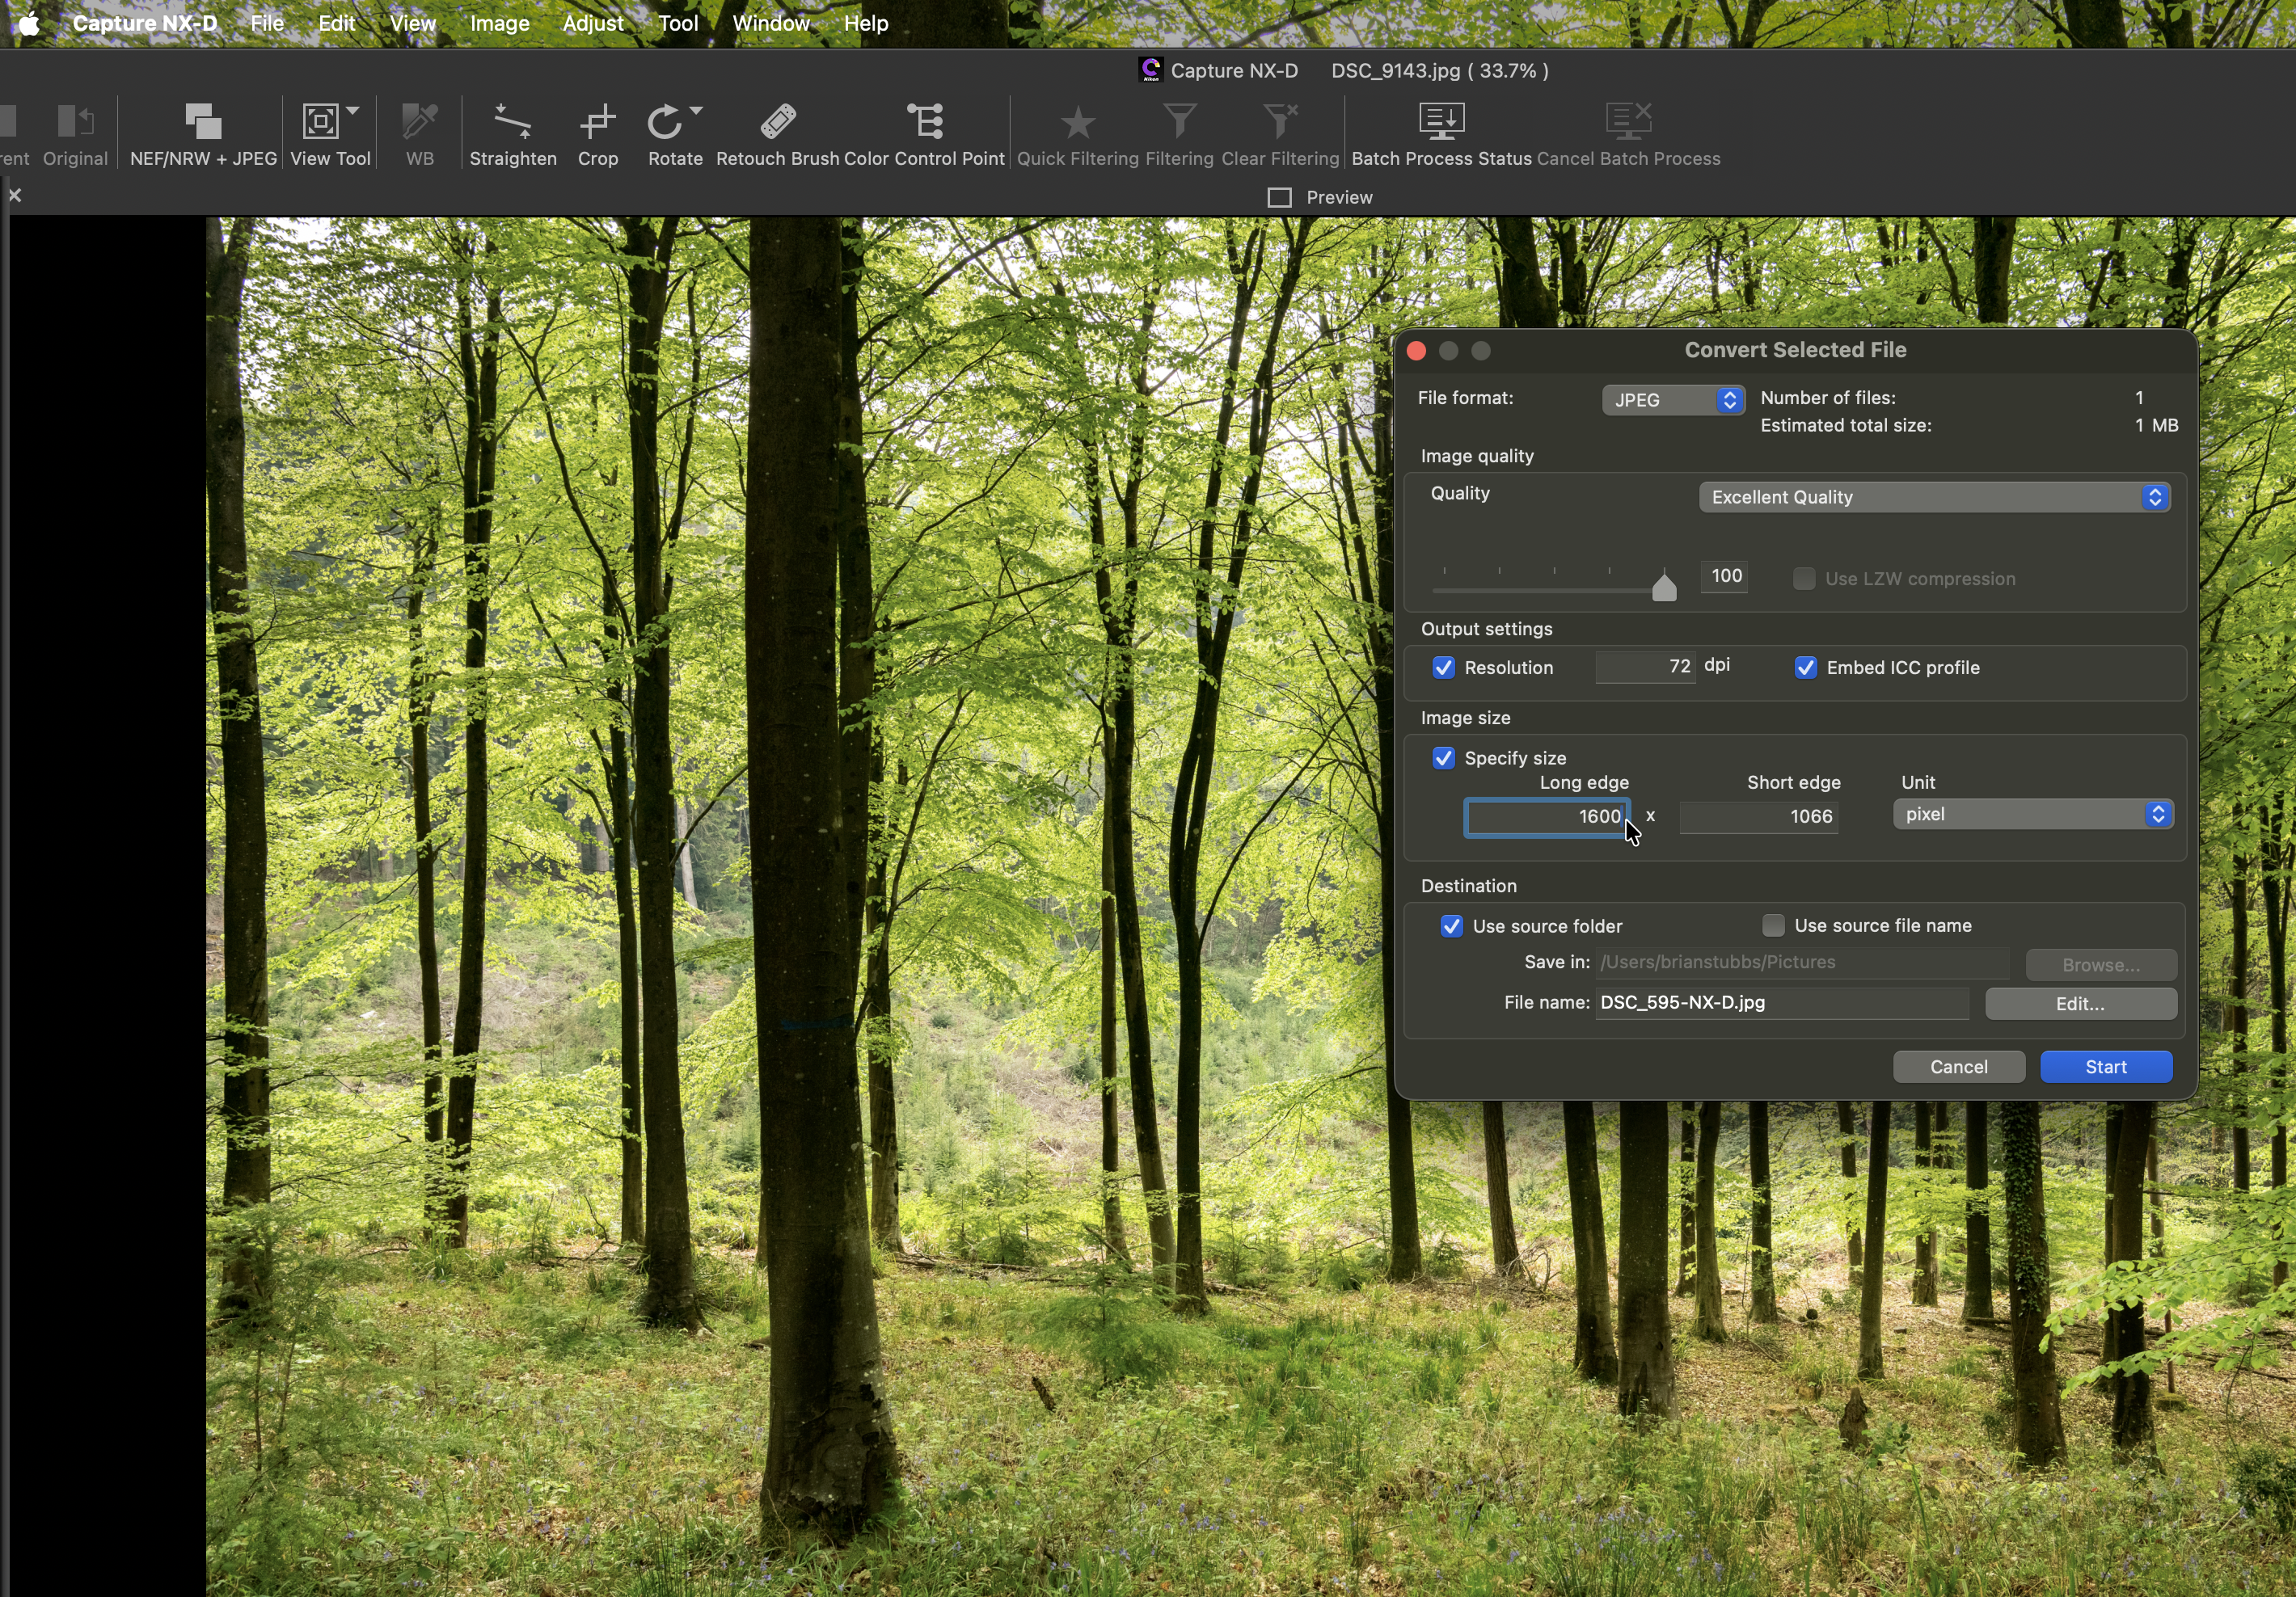
Specify the file format as JPEG
Image quality - Excellent Quality
For projected images Resolution of 72dpi is fine
Specify the long edge (width) as 1600 and the short edge 1200 for club competitions. Here you will see the software has again defaulted the short edge to 1066 pixels because the native ratio of the image is not 4:3. That is fine. The club specifications are maximum limits. The rest of the dialogue box refers to where the image is being saved. Then click "Start" to initiate the save at the amended size.
Back to Top of page